Category Archives: LXD

Custom user mappings in LXD containers

LXD logo

Introduction

As you may know, LXD uses unprivileged containers by default.
The difference between an unprivileged container and a privileged one is whether the root user in the container is the “real” root user (uid 0 at the kernel level).

The way unprivileged containers are created is by taking a set of normal UIDs and GIDs from the host, usually at least 65536 of each (to be POSIX compliant) and mapping those into the container.

The most common example and what most LXD users will end up with by default is a map of 65536 UIDs and GIDs, with a host base id of 100000. This means that root in the container (uid 0) will be mapped to the host uid 100000 and uid 65535 in the container will be mapped to uid 165535 on the host. UID/GID 65536 and higher in the container aren’t mapped and will return an error if you attempt to use them.

From a security point of view, that means that anything which is not owned by the users and groups mapped into the container will be inaccessible. Any such resource will show up as being owned by uid/gid “-1” (rendered as 65534 or nobody/nogroup in userspace). It also means that should there be a way to escape the container, even root in the container would find itself with just as much privileges on the host as a nobody user.

LXD does offer a number of options related to unprivileged configuration:

  • Increasing the size of the default uid/gid map
  • Setting up per-container maps
  • Punching holes into the map to expose host users and groups

Increasing the size of the default map

As mentioned above, in most cases, LXD will have a default map that’s made of 65536 uids/gids.

In most cases you won’t have to change that. There are however a few cases where you may have to:

  • You need access to uid/gid higher than 65535.
    This is most common when using network authentication inside of your containers.
  • You want to use per-container maps.
    In which case you’ll need 65536 available uid/gid per container.
  • You want to punch some holes in your container’s map and need access to host uids/gids.

The default map is usually controlled by the “shadow” set of utilities and files. On systems where that’s the case, the “/etc/subuid” and “/etc/subgid” files are used to configure those maps.

On systems that do not have a recent enough version of the “shadow” package. LXD will assume that it doesn’t have to share uid/gid ranges with anything else and will therefore assume control of a billion uids and gids, starting at the host uid/gid 100000.

But the common case, is a system with a recent version of shadow.
An example of what the configuration may look like is:

stgraber@castiana:~$ cat /etc/subuid
lxd:100000:65536
root:100000:65536

stgraber@castiana:~$ cat /etc/subgid
lxd:100000:65536
root:100000:65536

The maps for “lxd” and “root” should always be kept in sync. LXD itself is restricted by the “root” allocation. The “lxd” entry is used to track what needs to be removed if LXD is uninstalled.

Now if you want to increase the size of the map available to LXD. Simply edit both of the files and bump the last value from 65536 to whatever size you need. I tend to bump it to a billion just so I don’t ever have to think about it again:

stgraber@castiana:~$ cat /etc/subuid
lxd:100000:1000000000
root:100000:1000000000

stgraber@castiana:~$ cat /etc/subgid
lxd:100000:1000000000
root:100000:100000000

After altering those files, you need to restart LXD to have it detect the new map:

root@vorash:~# systemctl restart lxd
root@vorash:~# cat /var/log/lxd/lxd.log
lvl=info msg="LXD 2.14 is starting in normal mode" path=/var/lib/lxd t=2017-06-14T21:21:13+0000
lvl=warn msg="CGroup memory swap accounting is disabled, swap limits will be ignored." t=2017-06-14T21:21:13+0000
lvl=info msg="Kernel uid/gid map:" t=2017-06-14T21:21:13+0000
lvl=info msg=" - u 0 0 4294967295" t=2017-06-14T21:21:13+0000
lvl=info msg=" - g 0 0 4294967295" t=2017-06-14T21:21:13+0000
lvl=info msg="Configured LXD uid/gid map:" t=2017-06-14T21:21:13+0000
lvl=info msg=" - u 0 1000000 1000000000" t=2017-06-14T21:21:13+0000
lvl=info msg=" - g 0 1000000 1000000000" t=2017-06-14T21:21:13+0000
lvl=info msg="Connecting to a remote simplestreams server" t=2017-06-14T21:21:13+0000
lvl=info msg="Expiring log files" t=2017-06-14T21:21:13+0000
lvl=info msg="Done expiring log files" t=2017-06-14T21:21:13+0000
lvl=info msg="Starting /dev/lxd handler" t=2017-06-14T21:21:13+0000
lvl=info msg="LXD is socket activated" t=2017-06-14T21:21:13+0000
lvl=info msg="REST API daemon:" t=2017-06-14T21:21:13+0000
lvl=info msg=" - binding Unix socket" socket=/var/lib/lxd/unix.socket t=2017-06-14T21:21:13+0000
lvl=info msg=" - binding TCP socket" socket=[::]:8443 t=2017-06-14T21:21:13+0000
lvl=info msg="Pruning expired images" t=2017-06-14T21:21:13+0000
lvl=info msg="Updating images" t=2017-06-14T21:21:13+0000
lvl=info msg="Done pruning expired images" t=2017-06-14T21:21:13+0000
lvl=info msg="Done updating images" t=2017-06-14T21:21:13+0000
root@vorash:~#

As you can see, the configured map is logged at LXD startup and can be used to confirm that the reconfiguration worked as expected.

You’ll then need to restart your containers to have them start using your newly expanded map.

Per container maps

Provided that you have a sufficient amount of uid/gid allocated to LXD, you can configure your containers to use their own, non-overlapping allocation of uids and gids.

This can be useful for two reasons:

  1. You are running software which alters kernel resource ulimits.
    Those user-specific limits are tied to a kernel uid and will cross container boundaries leading to hard to debug issues where one container can perform an action but all others are then unable to do the same.
  2. You want to know that should there be a way for someone in one of your containers to somehow get access to the host that they still won’t be able to access or interact with any of the other containers.

The main downsides to using this feature are:

  • It’s somewhat wasteful with using 65536 uids and gids per container.
    That being said, you’d still be able to run over 60000 isolated containers before running out of system uids and gids.
  • It’s effectively impossible to share storage between two isolated containers as everything written by one will be seen as -1 by the other. There is ongoing work around virtual filesystems in the kernel that will eventually let us get rid of that limitation.

To have a container use its own distinct map, simply run:

stgraber@castiana:~$ lxc config set test security.idmap.isolated true
stgraber@castiana:~$ lxc restart test
stgraber@castiana:~$ lxc config get test volatile.last_state.idmap
[{"Isuid":true,"Isgid":false,"Hostid":165536,"Nsid":0,"Maprange":65536},{"Isuid":false,"Isgid":true,"Hostid":165536,"Nsid":0,"Maprange":65536}]

The restart step is needed to have LXD remap the entire filesystem of the container to its new map.
Note that this step will take a varying amount of time depending on the number of files in the container and the speed of your storage.

As can be seen above, after restart, the container is shown to have its own map of 65536 uids/gids.

If you want LXD to allocate more than the default 65536 uids/gids to an isolated container, you can bump the size of the allocation with:

stgraber@castiana:~$ lxc config set test security.idmap.size 200000
stgraber@castiana:~$ lxc restart test
stgraber@castiana:~$ lxc config get test volatile.last_state.idmap
[{"Isuid":true,"Isgid":false,"Hostid":165536,"Nsid":0,"Maprange":200000},{"Isuid":false,"Isgid":true,"Hostid":165536,"Nsid":0,"Maprange":200000}]

If you’re trying to allocate more uids/gids than are left in LXD’s allocation, LXD will let you know:

stgraber@castiana:~$ lxc config set test security.idmap.size 2000000000
error: Not enough uid/gid available for the container.

Direct user/group mapping

The fact that all uids/gids in an unprivileged container are mapped to a normally unused range on the host means that sharing of data between host and container is effectively impossible.

Now, what if you want to share your user’s home directory with a container?

The obvious answer to that is to define a new “disk” entry in LXD which passes your home directory to the container:

stgraber@castiana:~$ lxc config device add test home disk source=/home/stgraber path=/home/ubuntu
Device home added to test

So that was pretty easy, but did it work?

stgraber@castiana:~$ lxc exec test -- bash
root@test:~# ls -lh /home/
total 529K
drwx--x--x 45 nobody nogroup 84 Jun 14 20:06 ubuntu

No. The mount is clearly there, but it’s completely inaccessible to the container.
To fix that, we need to take a few extra steps:

  • Allow LXD’s use of our user uid and gid
  • Restart LXD to have it load the new map
  • Set a custom map for our container
  • Restart the container to have the new map apply
stgraber@castiana:~$ printf "lxd:$(id -u):1\nroot:$(id -u):1\n" | sudo tee -a /etc/subuid
lxd:201105:1
root:201105:1

stgraber@castiana:~$ printf "lxd:$(id -g):1\nroot:$(id -g):1\n" | sudo tee -a /etc/subgid
lxd:200512:1
root:200512:1

stgraber@castiana:~$ sudo systemctl restart lxd

stgraber@castiana:~$ printf "uid $(id -u) 1000\ngid $(id -g) 1000" | lxc config set test raw.idmap -

stgraber@castiana:~$ lxc restart test

At which point, things should be working in the container:

stgraber@castiana:~$ lxc exec test -- su ubuntu -l
ubuntu@test:~$ ls -lh
total 119K
drwxr-xr-x 5  ubuntu ubuntu 8 Feb 18 2016 data
drwxr-x--- 4  ubuntu ubuntu 6 Jun 13 17:05 Desktop
drwxr-xr-x 3  ubuntu ubuntu 28 Jun 13 20:09 Downloads
drwx------ 84 ubuntu ubuntu 84 Sep 14 2016 Maildir
drwxr-xr-x 4  ubuntu ubuntu 4 May 20 15:38 snap
ubuntu@test:~$ 

Conclusion

User namespaces, the kernel feature that makes those uid/gid mappings possible is a very powerful tool which finally made containers on Linux safe by design. It is however not the easiest thing to wrap your head around and all of that uid/gid map math can quickly become a major issue.

In LXD we’ve tried to expose just enough of those underlying features to be useful to our users while doing the actual mapping math internally. This makes things like the direct user/group mapping above significantly easier than it otherwise would be.

Going forward, we’re very interested in some of the work around uid/gid remapping at the filesystem level, this would let us decouple the on-disk user/group map from that used for processes, making it possible to share data between differently mapped containers and alter the various maps without needing to also remap the entire filesystem.

Extra information

The main LXD website is at: https://linuxcontainers.org/lxd
Development happens on Github at: https://github.com/lxc/lxd
Discussion forun: https://discuss.linuxcontainers.org
Mailing-list support happens on: https://lists.linuxcontainers.org
IRC support happens in: #lxcontainers on irc.freenode.net
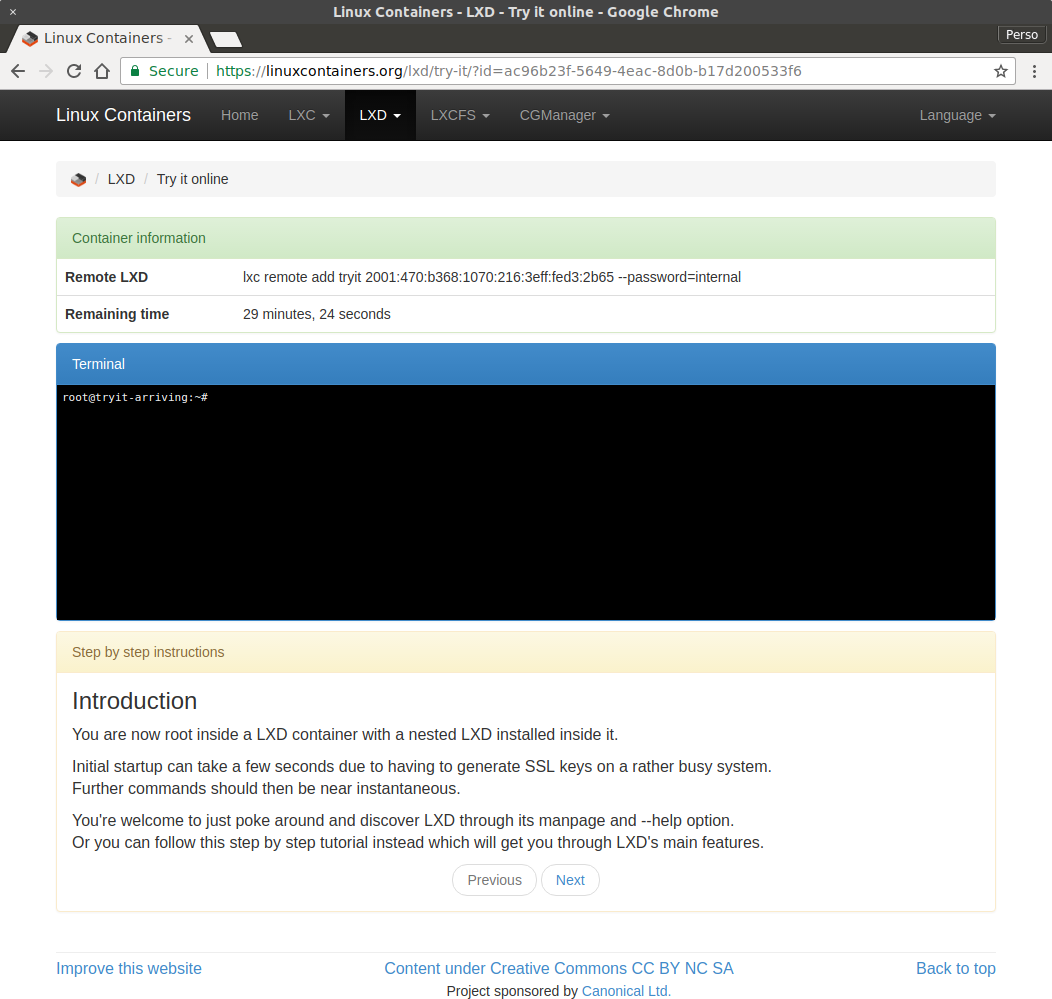
Try LXD online: https://linuxcontainers.org/lxd/try-it
Posted in Canonical voices, LXC, LXD, Planet Ubuntu | Tagged | 10 Comments

USB hotplug with LXD containers

LXD logo

USB devices in containers

It can be pretty useful to pass USB devices to a container. Be that some measurement equipment in a lab or maybe more commonly, an Android phone or some IoT device that you need to interact with.

Similar to what I wrote recently about GPUs, LXD supports passing USB devices into containers. Again, similarly to the GPU case, what’s actually passed into the container is a Unix character device, in this case, a /dev/bus/usb/ device node.

This restricts USB passthrough to those devices and software which use libusb to interact with them. For devices which use a kernel driver, the module should be installed and loaded on the host, and the resulting character or block device be passed to the container directly.

Note that for this to work, you’ll need LXD 2.5 or higher.

Example (Android debugging)

As an example which quite a lot of people should be able to relate to, lets run a LXD container with the Android debugging tools installed, accessing a USB connected phone.

This would for example allow you to have your app’s build system and CI run inside a container and interact with one or multiple devices connected over USB.

First, plug your phone over USB, make sure it’s unlocked and you have USB debugging enabled:

stgraber@dakara:~$ lsusb
Bus 002 Device 003: ID 0451:8041 Texas Instruments, Inc. 
Bus 002 Device 002: ID 0451:8041 Texas Instruments, Inc. 
Bus 002 Device 001: ID 1d6b:0003 Linux Foundation 3.0 root hub
Bus 001 Device 021: ID 17ef:6047 Lenovo 
Bus 001 Device 031: ID 046d:082d Logitech, Inc. HD Pro Webcam C920
Bus 001 Device 004: ID 0451:8043 Texas Instruments, Inc. 
Bus 001 Device 005: ID 046d:0a01 Logitech, Inc. USB Headset
Bus 001 Device 033: ID 0fce:51da Sony Ericsson Mobile Communications AB 
Bus 001 Device 003: ID 0451:8043 Texas Instruments, Inc. 
Bus 001 Device 002: ID 072f:90cc Advanced Card Systems, Ltd ACR38 SmartCard Reader
Bus 001 Device 001: ID 1d6b:0002 Linux Foundation 2.0 root hub

Spot your phone in that list, in my case, that’d be the “Sony Ericsson Mobile” entry.

Now let’s create our container:

stgraber@dakara:~$ lxc launch ubuntu:16.04 c1
Creating c1
Starting c1

And install the Android debugging client:

stgraber@dakara:~$ lxc exec c1 -- apt install android-tools-adb
Reading package lists... Done
Building dependency tree 
Reading state information... Done
The following NEW packages will be installed:
 android-tools-adb
0 upgraded, 1 newly installed, 0 to remove and 0 not upgraded.
Need to get 68.2 kB of archives.
After this operation, 198 kB of additional disk space will be used.
Get:1 http://archive.ubuntu.com/ubuntu xenial/universe amd64 android-tools-adb amd64 5.1.1r36+git20160322-0ubuntu3 [68.2 kB]
Fetched 68.2 kB in 0s (0 B/s) 
Selecting previously unselected package android-tools-adb.
(Reading database ... 25469 files and directories currently installed.)
Preparing to unpack .../android-tools-adb_5.1.1r36+git20160322-0ubuntu3_amd64.deb ...
Unpacking android-tools-adb (5.1.1r36+git20160322-0ubuntu3) ...
Processing triggers for man-db (2.7.5-1) ...
Setting up android-tools-adb (5.1.1r36+git20160322-0ubuntu3) ...

We can now attempt to list Android devices with:

stgraber@dakara:~$ lxc exec c1 -- adb devices
* daemon not running. starting it now on port 5037 *
* daemon started successfully *
List of devices attached

Since we’ve not passed any USB device yet, the empty output is expected.

Now, let’s pass the specific device listed in “lsusb” above:

stgraber@dakara:~$ lxc config device add c1 sony usb vendorid=0fce productid=51da
Device sony added to c1

And try to list devices again:

stgraber@dakara:~$ lxc exec c1 -- adb devices
* daemon not running. starting it now on port 5037 *
* daemon started successfully *
List of devices attached 
CB5A28TSU6 device

To get a shell, you can then use:

stgraber@dakara:~$ lxc exec c1 -- adb shell
* daemon not running. starting it now on port 5037 *
* daemon started successfully *
E5823:/ $

LXD USB devices support hotplug by default. So unplugging the device and plugging it back on the host will have it removed and re-added to the container.

The “productid” property isn’t required, you can set only the “vendorid” so that any device from that vendor will be automatically attached to the container. This can be very convenient when interacting with a number of similar devices or devices which change productid depending on what mode they’re in.

stgraber@dakara:~$ lxc config device remove c1 sony
Device sony removed from c1
stgraber@dakara:~$ lxc config device add c1 sony usb vendorid=0fce
Device sony added to c1
stgraber@dakara:~$ lxc exec c1 -- adb devices
* daemon not running. starting it now on port 5037 *
* daemon started successfully *
List of devices attached 
CB5A28TSU6 device

The optional “required” property turns off the hotplug behavior, requiring the device be present for the container to be allowed to start.

More details on USB device properties can be found here.

Conclusion

We are surrounded by a variety of odd USB devices, a good number of which come with possibly dodgy software, requiring a specific version of a specific Linux distribution to work. It’s sometimes hard to accommodate those requirements while keeping a clean and safe environment.

LXD USB device passthrough helps a lot in such cases, so long as the USB device uses a libusb based workflow and doesn’t require a specific kernel driver.

If you want to add a device which does use a kernel driver, locate the /dev node it creates, check if it’s a character or block device and pass that to LXD as a unix-char or unix-block type device.

Extra information

The main LXD website is at: https://linuxcontainers.org/lxd
Development happens on Github at: https://github.com/lxc/lxd
Mailing-list support happens on: https://lists.linuxcontainers.org
IRC support happens in: #lxcontainers on irc.freenode.net
Try LXD online: https://linuxcontainers.org/lxd/try-it
Posted in Canonical voices, LXD, Planet Ubuntu | Tagged | 1 Comment

NVidia CUDA inside a LXD container

LXD logo

GPU inside a container

LXD supports GPU passthrough but this is implemented in a very different way than what you would expect from a virtual machine. With containers, rather than passing a raw PCI device and have the container deal with it (which it can’t), we instead have the host setup with all needed drivers and only pass the resulting device nodes to the container.

This post focuses on NVidia and the CUDA toolkit specifically, but LXD’s passthrough feature should work with all other GPUs too. NVidia is just what I happen to have around.

The test system used below is a virtual machine with two NVidia GT 730 cards attached to it. Those are very cheap, low performance GPUs, that have the advantage of existing in low-profile PCI cards that fit fine in one of my servers and don’t require extra power.
For production CUDA workloads, you’ll want something much better than this.

Note that for this to work, you’ll need LXD 2.5 or higher.

Host setup

Install the CUDA tools and drivers on the host:

wget http://developer.download.nvidia.com/compute/cuda/repos/ubuntu1604/x86_64/cuda-repo-ubuntu1604_8.0.61-1_amd64.deb
sudo dpkg -i cuda-repo-ubuntu1604_8.0.61-1_amd64.deb
sudo apt update
sudo apt install cuda

Then reboot the system to make sure everything is properly setup. After that, you should be able to confirm that your NVidia GPU is properly working with:

ubuntu@canonical-lxd:~$ nvidia-smi 
Tue Mar 21 21:28:34 2017       
+-----------------------------------------------------------------------------+
| NVIDIA-SMI 375.39                 Driver Version: 375.39                    |
|-------------------------------+----------------------+----------------------+
| GPU  Name        Persistence-M| Bus-Id        Disp.A | Volatile Uncorr. ECC |
| Fan  Temp  Perf  Pwr:Usage/Cap|         Memory-Usage | GPU-Util  Compute M. |
|===============================+======================+======================|
|   0  GeForce GT 730      Off  | 0000:02:06.0     N/A |                  N/A |
| 30%   30C    P0    N/A /  N/A |      0MiB /  2001MiB |     N/A      Default |
+-------------------------------+----------------------+----------------------+
|   1  GeForce GT 730      Off  | 0000:02:08.0     N/A |                  N/A |
| 30%   26C    P0    N/A /  N/A |      0MiB /  2001MiB |     N/A      Default |
+-------------------------------+----------------------+----------------------+
                                                                               
+-----------------------------------------------------------------------------+
| Processes:                                                       GPU Memory |
|  GPU       PID  Type  Process name                               Usage      |
|=============================================================================|
|    0                  Not Supported                                         |
|    1                  Not Supported                                         |
+-----------------------------------------------------------------------------+

And can check that the CUDA tools work properly with:

ubuntu@canonical-lxd:~$ /usr/local/cuda-8.0/extras/demo_suite/bandwidthTest
[CUDA Bandwidth Test] - Starting...
Running on...

 Device 0: GeForce GT 730
 Quick Mode

 Host to Device Bandwidth, 1 Device(s)
 PINNED Memory Transfers
   Transfer Size (Bytes)	Bandwidth(MB/s)
   33554432			3059.4

 Device to Host Bandwidth, 1 Device(s)
 PINNED Memory Transfers
   Transfer Size (Bytes)	Bandwidth(MB/s)
   33554432			3267.4

 Device to Device Bandwidth, 1 Device(s)
 PINNED Memory Transfers
   Transfer Size (Bytes)	Bandwidth(MB/s)
   33554432			30805.1

Result = PASS

NOTE: The CUDA Samples are not meant for performance measurements. Results may vary when GPU Boost is enabled.

Container setup

First lets just create a regular Ubuntu 16.04 container:

ubuntu@canonical-lxd:~$ lxc launch ubuntu:16.04 c1
Creating c1
Starting c1

Then install the CUDA demo tools in there:

lxc exec c1 -- wget http://developer.download.nvidia.com/compute/cuda/repos/ubuntu1604/x86_64/cuda-repo-ubuntu1604_8.0.61-1_amd64.deb
lxc exec c1 -- dpkg -i cuda-repo-ubuntu1604_8.0.61-1_amd64.deb
lxc exec c1 -- apt update
lxc exec c1 -- apt install cuda-demo-suite-8-0 --no-install-recommends

At which point, you can run:

ubuntu@canonical-lxd:~$ lxc exec c1 -- nvidia-smi
NVIDIA-SMI has failed because it couldn't communicate with the NVIDIA driver. Make sure that the latest NVIDIA driver is installed and running.

Which is expected as LXD hasn’t been told to pass any GPU yet.

LXD GPU passthrough

LXD allows for pretty specific GPU passthrough, the details can be found here.
First let’s start with the most generic one, just allow access to all GPUs:

ubuntu@canonical-lxd:~$ lxc config device add c1 gpu gpu
Device gpu added to c1
ubuntu@canonical-lxd:~$ lxc exec c1 -- nvidia-smi
Tue Mar 21 21:47:54 2017       
+-----------------------------------------------------------------------------+
| NVIDIA-SMI 375.39                 Driver Version: 375.39                    |
|-------------------------------+----------------------+----------------------+
| GPU  Name        Persistence-M| Bus-Id        Disp.A | Volatile Uncorr. ECC |
| Fan  Temp  Perf  Pwr:Usage/Cap|         Memory-Usage | GPU-Util  Compute M. |
|===============================+======================+======================|
|   0  GeForce GT 730      Off  | 0000:02:06.0     N/A |                  N/A |
| 30%   30C    P0    N/A /  N/A |      0MiB /  2001MiB |     N/A      Default |
+-------------------------------+----------------------+----------------------+
|   1  GeForce GT 730      Off  | 0000:02:08.0     N/A |                  N/A |
| 30%   27C    P0    N/A /  N/A |      0MiB /  2001MiB |     N/A      Default |
+-------------------------------+----------------------+----------------------+
                                                                               
+-----------------------------------------------------------------------------+
| Processes:                                                       GPU Memory |
|  GPU       PID  Type  Process name                               Usage      |
|=============================================================================|
|    0                  Not Supported                                         |
|    1                  Not Supported                                         |
+-----------------------------------------------------------------------------+
ubuntu@canonical-lxd:~$ lxc config device remove c1 gpu
Device gpu removed from c1

Now just pass whichever is the first GPU:

ubuntu@canonical-lxd:~$ lxc config device add c1 gpu gpu id=0
Device gpu added to c1
ubuntu@canonical-lxd:~$ lxc exec c1 -- nvidia-smi
Tue Mar 21 21:50:37 2017       
+-----------------------------------------------------------------------------+
| NVIDIA-SMI 375.39                 Driver Version: 375.39                    |
|-------------------------------+----------------------+----------------------+
| GPU  Name        Persistence-M| Bus-Id        Disp.A | Volatile Uncorr. ECC |
| Fan  Temp  Perf  Pwr:Usage/Cap|         Memory-Usage | GPU-Util  Compute M. |
|===============================+======================+======================|
|   0  GeForce GT 730      Off  | 0000:02:06.0     N/A |                  N/A |
| 30%   30C    P0    N/A /  N/A |      0MiB /  2001MiB |     N/A      Default |
+-------------------------------+----------------------+----------------------+
                                                                               
+-----------------------------------------------------------------------------+
| Processes:                                                       GPU Memory |
|  GPU       PID  Type  Process name                               Usage      |
|=============================================================================|
|    0                  Not Supported                                         |
+-----------------------------------------------------------------------------+
ubuntu@canonical-lxd:~$ lxc config device remove c1 gpu
Device gpu removed from c1

You can also specify the GPU by vendorid and productid:

ubuntu@canonical-lxd:~$ lspci -nnn | grep NVIDIA
02:06.0 VGA compatible controller [0300]: NVIDIA Corporation GK208 [GeForce GT 730] [10de:1287] (rev a1)
02:07.0 Audio device [0403]: NVIDIA Corporation GK208 HDMI/DP Audio Controller [10de:0e0f] (rev a1)
02:08.0 VGA compatible controller [0300]: NVIDIA Corporation GK208 [GeForce GT 730] [10de:1287] (rev a1)
02:09.0 Audio device [0403]: NVIDIA Corporation GK208 HDMI/DP Audio Controller [10de:0e0f] (rev a1)
ubuntu@canonical-lxd:~$ lxc config device add c1 gpu gpu vendorid=10de productid=1287
Device gpu added to c1
ubuntu@canonical-lxd:~$ lxc exec c1 -- nvidia-smi
Tue Mar 21 21:52:40 2017       
+-----------------------------------------------------------------------------+
| NVIDIA-SMI 375.39                 Driver Version: 375.39                    |
|-------------------------------+----------------------+----------------------+
| GPU  Name        Persistence-M| Bus-Id        Disp.A | Volatile Uncorr. ECC |
| Fan  Temp  Perf  Pwr:Usage/Cap|         Memory-Usage | GPU-Util  Compute M. |
|===============================+======================+======================|
|   0  GeForce GT 730      Off  | 0000:02:06.0     N/A |                  N/A |
| 30%   30C    P0    N/A /  N/A |      0MiB /  2001MiB |     N/A      Default |
+-------------------------------+----------------------+----------------------+
|   1  GeForce GT 730      Off  | 0000:02:08.0     N/A |                  N/A |
| 30%   27C    P0    N/A /  N/A |      0MiB /  2001MiB |     N/A      Default |
+-------------------------------+----------------------+----------------------+
                                                                               
+-----------------------------------------------------------------------------+
| Processes:                                                       GPU Memory |
|  GPU       PID  Type  Process name                               Usage      |
|=============================================================================|
|    0                  Not Supported                                         |
|    1                  Not Supported                                         |
+-----------------------------------------------------------------------------+
ubuntu@canonical-lxd:~$ lxc config device remove c1 gpu
Device gpu removed from c1

Which adds them both as they are exactly the same model in my setup.

But for such cases, you can also select using the card’s PCI ID with:

ubuntu@canonical-lxd:~$ lxc config device add c1 gpu gpu pci=0000:02:08.0
Device gpu added to c1
ubuntu@canonical-lxd:~$ lxc exec c1 -- nvidia-smi
Tue Mar 21 21:56:52 2017       
+-----------------------------------------------------------------------------+
| NVIDIA-SMI 375.39                 Driver Version: 375.39                    |
|-------------------------------+----------------------+----------------------+
| GPU  Name        Persistence-M| Bus-Id        Disp.A | Volatile Uncorr. ECC |
| Fan  Temp  Perf  Pwr:Usage/Cap|         Memory-Usage | GPU-Util  Compute M. |
|===============================+======================+======================|
|   0  GeForce GT 730      Off  | 0000:02:08.0     N/A |                  N/A |
| 30%   27C    P0    N/A /  N/A |      0MiB /  2001MiB |     N/A      Default |
+-------------------------------+----------------------+----------------------+
                                                                               
+-----------------------------------------------------------------------------+
| Processes:                                                       GPU Memory |
|  GPU       PID  Type  Process name                               Usage      |
|=============================================================================|
|    0                  Not Supported                                         |
+-----------------------------------------------------------------------------+
ubuntu@canonical-lxd:~$ lxc config device remove c1 gpu 
Device gpu removed from c1

And lastly, lets confirm that we get the same result as on the host when running a CUDA workload:

ubuntu@canonical-lxd:~$ lxc config device add c1 gpu gpu
Device gpu added to c1
ubuntu@canonical-lxd:~$ lxc exec c1 -- /usr/local/cuda-8.0/extras/demo_suite/bandwidthTest
[CUDA Bandwidth Test] - Starting...
Running on...

 Device 0: GeForce GT 730
 Quick Mode

 Host to Device Bandwidth, 1 Device(s)
 PINNED Memory Transfers
   Transfer Size (Bytes)	Bandwidth(MB/s)
   33554432			3065.4

 Device to Host Bandwidth, 1 Device(s)
 PINNED Memory Transfers
   Transfer Size (Bytes)	Bandwidth(MB/s)
   33554432			3305.8

 Device to Device Bandwidth, 1 Device(s)
 PINNED Memory Transfers
   Transfer Size (Bytes)	Bandwidth(MB/s)
   33554432			30825.7

Result = PASS

NOTE: The CUDA Samples are not meant for performance measurements. Results may vary when GPU Boost is enabled.

Conclusion

LXD makes it very easy to share one or multiple GPUs with your containers.
You can either dedicate specific GPUs to specific containers or just share them.

There is no of the overhead involved with usual PCI based passthrough and only a single instance of the driver is running with the containers acting just like normal host user processes would.

This does however require that your containers run a version of the CUDA tools which supports whatever version of the NVidia drivers is installed on the host.

Extra information

The main LXD website is at: https://linuxcontainers.org/lxd
Development happens on Github at: https://github.com/lxc/lxd
Mailing-list support happens on: https://lists.linuxcontainers.org
IRC support happens in: #lxcontainers on irc.freenode.net
Try LXD online: https://linuxcontainers.org/lxd/try-it

Posted in Canonical voices, LXD, Planet Ubuntu | Tagged | 16 Comments

Run your own LXD demo server

LXD logo

The LXD demo server

The LXD demo server is the service behind https://linuxcontainers.org/lxd/try-it.
We use it to showcase LXD by leading visitors through an interactive tour of LXD’s features.

Rather than use some javascript simulation of LXD and its client tool, we give our visitors a real root shell using a LXD container with nesting enabled. This environment is using all of LXD’s resource limits as well as a very strict firewall to prevent abuses and offer everyone a great experience.

This is done using lxd-demo-server which can be found at: https://github.com/lxc/lxd-demo-server
The lxd-demo-server is a daemon that offers a public REST API for use from a web browser.
It supports:

  • Creating containers from an existing container or from a LXD image
  • Choose what command to execute in the containers on connection
  • Lets you choose specific profiles to apply to the containers
  • An API to record user feedback
  • An API to fetch usage statistics for reporting
  • A number of resource restrictions:
    • CPU
    • Disk quota (if using btrfs or zfs as the LXD storage backend)
    • Processes
    • Memory
    • Number of sessions per IP
    • Time limit for the session
    • Total number of concurrent sessions
  • Requiring the user to read and agree to terms of service
  • Recording all sessions in a sqlite3 database
  • A maintenance mode

All of it is configured through a simple yaml configuration file.

Setting up your own

The LXD demo server is now available as a snap package and interacts with the snap version of LXD. To install it on your own system, all you need to do is:

Make sure you don’t have the deb version of LXD installed

ubuntu@djanet:~$ sudo apt remove --purge lxd lxd-client
Reading package lists... Done
Building dependency tree 
Reading state information... Done
The following packages will be REMOVED:
 lxd* lxd-client*
0 upgraded, 0 newly installed, 2 to remove and 0 not upgraded.
After this operation, 25.3 MB disk space will be freed.
Do you want to continue? [Y/n] 
(Reading database ... 59776 files and directories currently installed.)
Removing lxd (2.0.9-0ubuntu1~16.04.2) ...
Warning: Stopping lxd.service, but it can still be activated by:
 lxd.socket
Purging configuration files for lxd (2.0.9-0ubuntu1~16.04.2) ...
Removing lxd-client (2.0.9-0ubuntu1~16.04.2) ...
Processing triggers for man-db (2.7.5-1) ...

Install the LXD snap

ubuntu@djanet:~$ sudo snap install lxd
lxd 2.8 from 'canonical' installed

Then configure LXD

ubuntu@djanet:~$ sudo lxd init
Name of the storage backend to use (dir or zfs) [default=zfs]: 
Create a new ZFS pool (yes/no) [default=yes]? 
Name of the new ZFS pool [default=lxd]: 
Would you like to use an existing block device (yes/no) [default=no]? 
Size in GB of the new loop device (1GB minimum) [default=43]: 
Would you like LXD to be available over the network (yes/no) [default=no]? 
Would you like stale cached images to be updated automatically (yes/no) [default=yes]? 
Would you like to create a new network bridge (yes/no) [default=yes]? 
What should the new bridge be called [default=lxdbr0]? 
What IPv4 address should be used (CIDR subnet notation, “auto” or “none”) [default=auto]? 
What IPv6 address should be used (CIDR subnet notation, “auto” or “none”) [default=auto]? 
LXD has been successfully configured.

And finally install lxd-demo-server itself

ubuntu@djanet:~$ sudo snap install lxd-demo-server
lxd-demo-server git from 'stgraber' installed
ubuntu@djanet:~$ sudo snap connect lxd-demo-server:lxd lxd:lxd

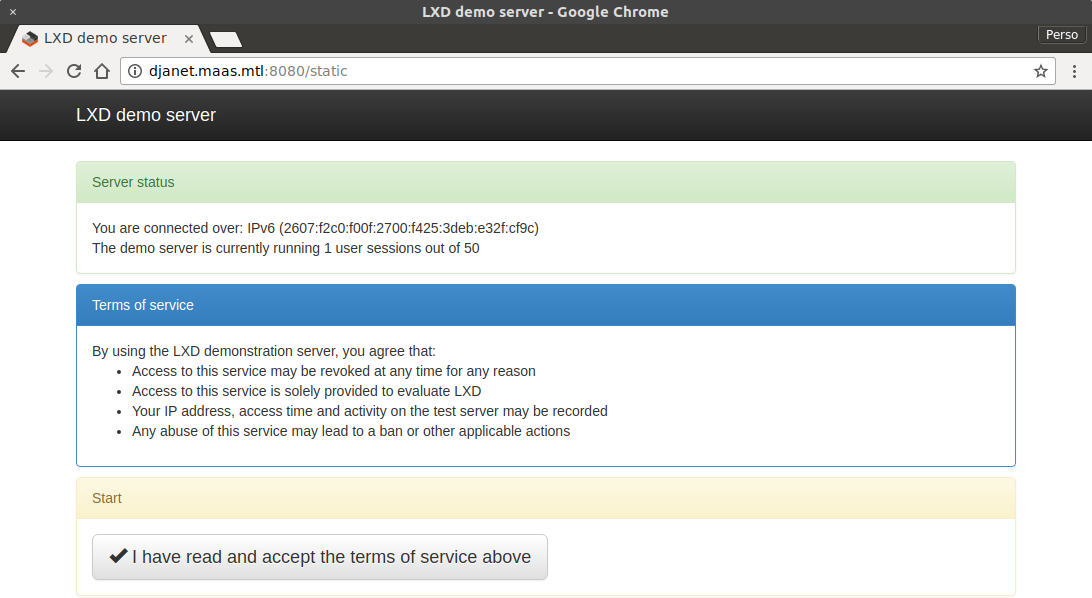
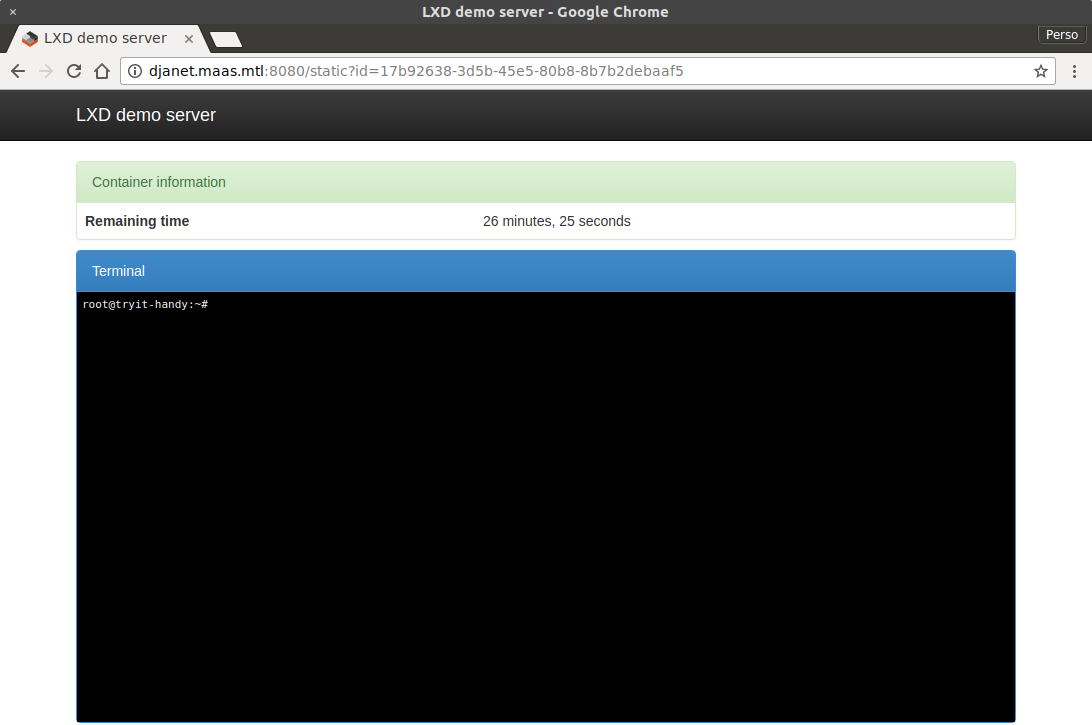
At that point, you can hit http://127.0.0.1:8080 and will be greeted with this:

To change the configuration, use:

ubuntu@djanet:~$ sudo lxd-demo-server.configure

And that’s it, you have your own instance of the demo server.

Security

As mentioned at the beginning, the demo server comes with a number of options to prevent users from using all the available resources themselves and bringing the whole thing down.

Those should be tweaked for your particular needs and should also update the total number of concurrent sessions so that you don’t end up over-committing on resources.

On the network side of things, the demo server itself doesn’t do any kind of firewalling or similar network restrictions. If you plan on offering sessions to anyone online, you should make sure that the network which LXD is using is severely restricted and that the host this is running on is also placed in a very restricted part of your network.

Containers handed to strangers should never be using “security.privileged” as that’d be a straight route to getting root privileges on the host. You should also stay away from bind-mounting any part of the host’s filesystem into those containers.

I would also very strongly recommend setting up very frequent security updates on your host and kernel live patching or at least automatic reboot when a new kernel is installed. This should avoid a new kernel security issue from being immediately exploited in your environment.

Conclusion

The LXD demo server was initially written as a quick hack to expose a LXD instance to the Internet so we could let people try LXD online and also offer the upstream team a reliable environment we could have people attempt to reproduce their bugs into.

It’s since grown a bit with new features contributed by users and with improvements we’ve made to the original experience on our website.

We’ve now served over 36000 sessions to over 26000 unique visitors. This has been a great tool for people to try and experience LXD and I hope it will be similarly useful to other projects.

Extra information

The main LXD website is at: https://linuxcontainers.org/lxd
Development happens on Github at: https://github.com/lxc/lxd
Mailing-list support happens on: https://lists.linuxcontainers.org
IRC support happens in: #lxcontainers on irc.freenode.net
Try LXD online: https://linuxcontainers.org/lxd/try-it

Posted in Canonical voices, LXD, Planet Ubuntu | Tagged | 2 Comments

LXD 2.0: Debugging and contributing to LXD [12/12]

This is the twelfth and last blog post in this series about LXD 2.0.

LXD logo

Introduction

This is finally it! The last blog post in this series of 12 that started almost a year ago.

If you followed the series from the beginning, you should have been using LXD for quite a bit of time now and be pretty familiar with its day to day operation and capabilities.

But what if something goes wrong? What can you do to track down the problem yourself? And if you can’t, what information should you record so that upstream can track down the problem?

And what if you want to fix issues yourself or help improve LXD by implementing the features you need? How do you build, test and contribute to the LXD code base?

Debugging LXD & filing bug reports

LXD log files

/var/log/lxd/lxd.log

This is the main LXD log file. To avoid filling up your disk very quickly, only log messages marked as INFO, WARNING or ERROR are recorded there by default. You can change that behavior by passing “–debug” to the LXD daemon.

/var/log/lxd/CONTAINER/lxc.conf

Whenever you start a container, this file is updated with the configuration that’s passed to LXC.
This shows exactly how the container will be configured, including all its devices, bind-mounts, …

/var/log/lxd/CONTAINER/forkexec.log

This file will contain errors coming from LXC when failing to execute a command.
It’s extremely rare for anything to end up in there as LXD usually handles errors much before that.

/var/log/lxd/CONTAINER/forkstart.log

This file will contain errors coming from LXC when starting the container.
It’s extremely rare for anything to end up in there as LXD usually handles errors much before that.

CRIU logs (for live migration)

If you are using CRIU for container live migration or live snapshotting there are additional log files recorded every time a CRIU dump is generated or a dump is restored.

Those logs can also be found in /var/log/lxd/CONTAINER/ and are timestamped so that you can find whichever matches your most recent attempt. They will contain a detailed record of everything that’s dumped and restored by CRIU and are far better for understanding a failure than the typical migration/snapshot error message.

LXD debug messages

As mentioned above, you can switch the daemon to doing debug logging with the –debug option.
An alternative to that is to connect to the daemon’s event interface which will show you all log entries, regardless of the configured log level (even works remotely).

An example for “lxc init ubuntu:16.04 xen” would be:
lxd.log:

INFO[02-24|18:14:09] Starting container action=start created=2017-02-24T23:11:45+0000 ephemeral=false name=xen stateful=false used=1970-01-01T00:00:00+0000
INFO[02-24|18:14:10] Started container action=start created=2017-02-24T23:11:45+0000 ephemeral=false name=xen stateful=false used=1970-01-01T00:00:00+0000

lxc monitor –type=logging:

metadata:
  context: {}
  level: dbug
  message: 'New events listener: 9b725741-ffe7-4bfc-8d3e-fe620fc6e00a'
timestamp: 2017-02-24T18:14:01.025989062-05:00
type: logging


metadata:
  context:
    ip: '@'
    method: GET
    url: /1.0
  level: dbug
  message: handling
timestamp: 2017-02-24T18:14:09.341283344-05:00
type: logging


metadata:
  context:
    driver: storage/zfs
  level: dbug
  message: StorageCoreInit
timestamp: 2017-02-24T18:14:09.341536477-05:00
type: logging


metadata:
  context:
    ip: '@'
    method: GET
    url: /1.0/containers/xen
  level: dbug
  message: handling
timestamp: 2017-02-24T18:14:09.347709394-05:00
type: logging


metadata:
  context:
    ip: '@'
    method: PUT
    url: /1.0/containers/xen/state
  level: dbug
  message: handling
timestamp: 2017-02-24T18:14:09.357046302-05:00
type: logging


metadata:
  context: {}
  level: dbug
  message: 'New task operation: 2e2cf904-c4c4-4693-881f-57897d602ad3'
timestamp: 2017-02-24T18:14:09.358387853-05:00
type: logging


metadata:
  context: {}
  level: dbug
  message: 'Started task operation: 2e2cf904-c4c4-4693-881f-57897d602ad3'
timestamp: 2017-02-24T18:14:09.358578599-05:00
type: logging


metadata:
  context:
    ip: '@'
    method: GET
    url: /1.0/operations/2e2cf904-c4c4-4693-881f-57897d602ad3/wait
  level: dbug
  message: handling
timestamp: 2017-02-24T18:14:09.366213106-05:00
type: logging


metadata:
  context:
    driver: storage/zfs
  level: dbug
  message: StoragePoolInit
timestamp: 2017-02-24T18:14:09.369636451-05:00
type: logging


metadata:
  context:
    driver: storage/zfs
  level: dbug
  message: StoragePoolCheck
timestamp: 2017-02-24T18:14:09.369771164-05:00
type: logging


metadata:
  context:
    container: xen
    driver: storage/zfs
  level: dbug
  message: ContainerMount
timestamp: 2017-02-24T18:14:09.424696767-05:00
type: logging


metadata:
  context:
    driver: storage/zfs
    name: xen
  level: dbug
  message: ContainerUmount
timestamp: 2017-02-24T18:14:09.432723719-05:00
type: logging


metadata:
  context:
    container: xen
    driver: storage/zfs
  level: dbug
  message: ContainerMount
timestamp: 2017-02-24T18:14:09.721067917-05:00
type: logging


metadata:
  context:
    action: start
    created: 2017-02-24 23:11:45 +0000 UTC
    ephemeral: "false"
    name: xen
    stateful: "false"
    used: 1970-01-01 00:00:00 +0000 UTC
  level: info
  message: Starting container
timestamp: 2017-02-24T18:14:09.749808518-05:00
type: logging


metadata:
  context:
    ip: '@'
    method: GET
    url: /1.0
  level: dbug
  message: handling
timestamp: 2017-02-24T18:14:09.792551375-05:00
type: logging


metadata:
  context:
    driver: storage/zfs
  level: dbug
  message: StorageCoreInit
timestamp: 2017-02-24T18:14:09.792961032-05:00
type: logging


metadata:
  context:
    ip: '@'
    method: GET
    url: /internal/containers/23/onstart
  level: dbug
  message: handling
timestamp: 2017-02-24T18:14:09.800803501-05:00
type: logging


metadata:
  context:
    driver: storage/zfs
  level: dbug
  message: StoragePoolInit
timestamp: 2017-02-24T18:14:09.803190248-05:00
type: logging


metadata:
  context:
    driver: storage/zfs
  level: dbug
  message: StoragePoolCheck
timestamp: 2017-02-24T18:14:09.803251188-05:00
type: logging


metadata:
  context:
    container: xen
    driver: storage/zfs
  level: dbug
  message: ContainerMount
timestamp: 2017-02-24T18:14:09.803306055-05:00
type: logging


metadata:
  context: {}
  level: dbug
  message: 'Scheduler: container xen started: re-balancing'
timestamp: 2017-02-24T18:14:09.965080432-05:00
type: logging


metadata:
  context:
    action: start
    created: 2017-02-24 23:11:45 +0000 UTC
    ephemeral: "false"
    name: xen
    stateful: "false"
    used: 1970-01-01 00:00:00 +0000 UTC
  level: info
  message: Started container
timestamp: 2017-02-24T18:14:10.162965059-05:00
type: logging


metadata:
  context: {}
  level: dbug
  message: 'Success for task operation: 2e2cf904-c4c4-4693-881f-57897d602ad3'
timestamp: 2017-02-24T18:14:10.163072893-05:00
type: logging

The format from “lxc monitor” is a bit different from what you’d get in a log file where each entry is condense into a single line, but more importantly you see all those “level: dbug” entries

Where to report bugs

LXD bugs

The best place to report LXD bugs is upstream at https://github.com/lxc/lxd/issues.
Make sure to fill in everything in the bug reporting template as that information saves us a lot of back and forth to reproduce your environment.

Ubuntu bugs

If you find a problem with the Ubuntu package itself, failing to install, upgrade or remove. Or run into issues with the LXD init scripts. The best place to report such bugs is on Launchpad.

On an Ubuntu system, you can do so with: ubuntu-bug lxd
This will automatically include a number of log files and package information for us to look at.

CRIU bugs

Bugs that are related to CRIU which you can spot by the usually pretty visible CRIU error output should be reported on Launchpad with: ubuntu-bug criu

Do note that the use of CRIU through LXD is considered to be a beta feature and unless you are willing to pay for support through a support contract with Canonical, it may take a while before we get to look at your bug report.

Contributing to LXD

LXD is written in Go and hosted on Github.
We welcome external contributions of any size. There is no CLA or similar legal agreement to sign to contribute to LXD, just the usual Developer Certificate of Ownership (Signed-off-by: line).

We have a number of potential features listed on our issue tracker that can make good starting points for new contributors. It’s usually best to first file an issue before starting to work on code, just so everyone knows that you’re doing that work and so we can give some early feedback.

Building LXD from source

Upstream maintains up to date instructions here: https://github.com/lxc/lxd#building-from-source

You’ll want to fork the upstream repository on Github and then push your changes to your branch. We recommend rebasing on upstream LXD daily as we do tend to merge changes pretty regularly.

Running the testsuite

LXD maintains two sets of tests. Unit tests and integration tests. You can run all of them with:

sudo -E make check

To run the unit tests only, use:

sudo -E go test ./...

To run the integration tests, use:

cd test
sudo -E ./main.sh

That latter one supports quite a number of environment variables to test various storage backends, disable network tests, use a ramdisk or just tweak log output. Some of those are:

  • LXD_BACKEND: One of “btrfs”, “dir”, “lvm” or “zfs” (defaults to “dir”)
    Lets your run the whole testsuite with any of the LXD storage drivers.
  • LXD_CONCURRENT: “true” or “false” (defaults to “false”)
    This enables a few extra concurrency tests.
  • LXD_DEBUG: “true” or “false” (defaults to “false”)
    This will log all shell commands and run all LXD commands in debug mode.
  • LXD_INSPECT: “true” or “false” (defaults to “false”)
    This will cause the testsuite to hang on failure so you can inspect the environment.
  • LXD_LOGS: A directory to dump all LXD log files into (defaults to “”)
    The “logs” directory of all spawned LXD daemons will be copied over to this path.
  • LXD_OFFLINE: “true” or “false” (defaults to “false”)
    Disables any test which relies on outside network connectivity.
  • LXD_TEST_IMAGE: path to a LXD image in the unified format (defaults to “”)
    Lets you use a custom test image rather than the default minimal busybox image.
  • LXD_TMPFS: “true” or “false” (defaults to “false”)
    Runs the whole testsuite within a “tmpfs” mount, this can use quite a bit of memory but makes the testsuite significantly faster.
  • LXD_VERBOSE: “true” or “false” (defaults to “false”)
    A less extreme version of LXD_DEBUG. Shell commands are still logged but –debug isn’t passed to the LXC commands and the LXD daemon only runs with –verbose.

The testsuite will alert you to any missing dependency before it actually runs. A test run on a reasonably fast machine can be done under 10 minutes.

Sending your branch

Before sending a pull request, you’ll want to confirm that:

  • Your branch has been rebased on the upstream branch
  • All your commits messages include the “Signed-off-by: First Last <email>” line
  • You’ve removed any temporary debugging code you may have used
  • You’ve squashed related commits together to keep your branch easily reviewable
  • The unit and integration tests all pass

Once that’s all done, open a pull request on Github. Our Jenkins will validate that the commits are all signed-off, a test build on MacOS and Windows will automatically be performed and if things look good, we’ll trigger a full Jenkins test run that will test your branch on all storage backends, 32bit and 64bit and all the Go versions we care about.

This typically takes less than an hour to happen, assuming one of us is around to trigger Jenkins.

Once all the tests are done and we’re happy with the code itself, your branch will be merged into master and your code will be in the next LXD feature release. If the changes are suitable for the LXD stable-2.0 branch, we’ll backport them for you.

Conclusion

I hope this series of blog post has been helpful in understanding what LXD is and what it can do!

This series’ scope was limited to the LTS version of LXD (2.0.x) but we also do monthly feature releases for those who want the latest features. You can find a few other blog posts covering such features listed in the original LXD 2.0 series post.

Extra information

The main LXD website is at: https://linuxcontainers.org/lxd
Development happens on Github at: https://github.com/lxc/lxd
Mailing-list support happens on: https://lists.linuxcontainers.org
IRC support happens in: #lxcontainers on irc.freenode.net
Try LXD online: https://linuxcontainers.org/lxd/try-it

Posted in Canonical voices, LXD, Planet Ubuntu | Tagged | 1 Comment